A note on my baby turning one!

My babyZee is one.

I blinked and the year went by. It was yesterday we brought our little bundle of joy home. It was yesterday, I got this unsurmountable feeling of handing a sibling to my older one. It was yesterday, we became proud parents one more time.

You are a blissful baby for us and a wonder for your brother who was, and still is more than amazed at all the baby things you do—your squirms and stares, and smiles and giggles and gurgles and babbles. Watching you, holding you, conversing and playing with you has been such a delightful journey. You in no time changed our home from a cool quiet place to a noisy household filled with a new flow of energy.

I could never had enough despite being a mom second time. You gave me some of the most precious feelings in the world.

You revived the joy of holding my heart out of my body. You revived that sweet smell of a newborn. You revived how the grab of those teeny weeny fingers felt like. You revived the echo of gurgles and coos and infectious smiles. You revived what it felt like watching your own made human incessantly. You gave the feeling of being the most desired person on earth for this new human. Thanks my darling for letting me live those moments one more time.

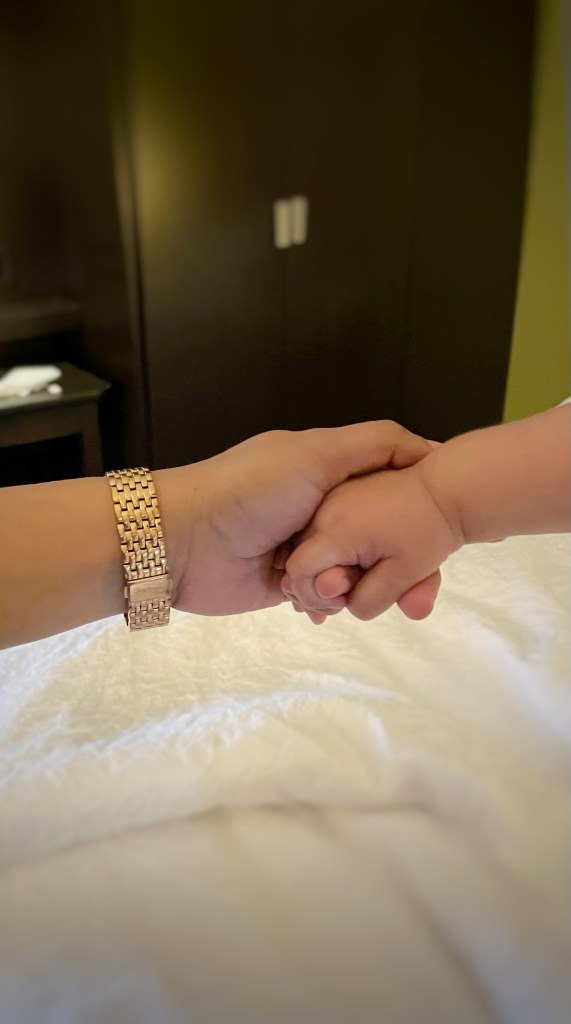
You gave me the joy of handing you to your brother. All the worries of changing family dynamics had all disappeared in no time when we met you. You both doting over each other are some of the most precious moments for me.

As a woman you made me stronger than ever before—surviving the incredibly difficult times of coronial era, coming out of the health issues that came along and letting go the people and energy that serve no purpose. Your birth told me the things I didn’t know I was capable of.

I must say, being a second time mom was quite different. I was now aware of how fleeting the times are. I was now aware how soon it will be when you outgrow my arms. I was now aware how soon it will be when you start to roll, sit, walk or sleep through the night.

So, the least I wish is to rush to the milestones. So, the least I feel is to be overwhelmed— by a long day, a clingy baby or sleepless nights. So, the least I wish is to crave for silence or a mess-free home.

Because I know, with every milestone, you are gonna leave behind a little of the little you. And I am so very much going to miss it. And here I am, already missing that squirmy, squiggly infant we brought home😌😌, since you are my big little boy today. I wish I could soak in those baby moments forever. But nevertheless, that little more will always be a little less I guess!

This year was such a blessing from God for all of us specially when the times were a little tougher for everyone around. You gave our little family of three precious moments to celebrate, to laugh, to be silly, and our biggest share of joy. I can’t be thankful enough for every bit of it.

Energy Bars

If you are looking forward to some make ahead quick breakfast ideas, then these energy bars are something not to be missed upon. These are super easy to make and in only 3 steps.

These energy bars are our family’s favorite. I prefer making it in advance and storing it in an airtight container. They are a savior as quick to-go breakfast on busy mornings or a filling snack in the evenings. They remain nice and crisp for a good amount of time as well.

These bars are not only wholesome, but also highly adaptive and can be varied with a number of ingredients. I find that peanut butter gives a good binding to the ingredients as compared to almond butter. You can also add whipped frosting of any flavors, just to give an additional twist of taste.

Ingredients:
2 cups rolled oats
2/3 cups peanut butter (or any other nut butter)
I cup nuts such as almonds, walnuts, pistachios, dry dates etc.
2tbs flax seed
¼ cup honey
Chocolate chips

Directions:

1. Take rolled oats, dried fruits, flax seed powder, peanut butter, almond butter and honey in a dish.


2. In a chopper, coarsely grind all the ingredients.


3. Now add choco chips to the mixture.

4. Next, take a raised baking dish, firmly press the mixture into it. Cover it for 2hrs or until firm.

4. Now using a knife slice it into bars. Store it into an airtight container.

Waffle Pops recipe

If you are looking for a delicious crispy yet chewy waffle recipe, you are at the right place. These waffles call for just the perfect treat for your kiddos. For mine, it was a heavenly delight and he was over the moon when I made these.

I have been recently obssesed with my mini Dash waffle maker. The waffles are perfect in size if you are trying to eat a limited portion plus the texture too is perfect. These are not as soft as the Belgian Waffles and the crispiness is also particularly distinct. It will not be wrong to say that this mini device can make a massive impact in any kitchen.

The batter used is close to the pancake batter, just that it takes melted butter in addition. And of course, the measurements for batter also need to be precisely followed since the change in batter consistency will lead to variable results.

Ingredients:

1 cup all purpose flour
1 tbsp sugar
2 tsp baking powder
1/4 tsp salt
1 large egg
1 cup milk
2 tbsp softened unsalted butter
Popsicle sticks

For waffle pop coating

1 cup chocolate frosting
1 cup vanilla frosting
Water

For topping

Marshmallows
Chocolate sauce
Sprinkles

Directions:

1. Mix together flour, sugar, baking powder and salt in a medium bowl.

2. Whisk together milk, egg and melted butter in a separate bowl. Add the wet ingredients to the dry mix until nicely combined.

3. Add 2 tbsp of batter to the waffle maker and cook for 6-4 minutes, it will turn golden brown on both the sides.

4. Vertically insert popsicle stick through each waffle while warm.

For Waffle Pop coating

1. Mix chocolate frosting and vanilla frosting separately with water in a medium bowl.

2. Holding the popsicle stick, dip half from the sides of each waffle into a bowl.

3. Now top with sprinkles, marshmallows and chocolate drizzle.

Notes:

1. If you substitute ingredients, they may not work the same way.

2. Units of measure shouldn’t be altered.

3. When whisking, don’t overwhisk else the waffles tend to lose their crispiness and get softer.

4. Different waffle makers give different results, for example a Belgian Waffle maker will make relatively softer waffles, so do a research before buying one.

DIY Solar Oven

This DIY Solar Oven is an interesting project to study how sun’s energy can be used as a clean source of power. It not involves a interesting steps of crafting but also each step demonstrates important concepts of science involved.

Well, we had made a solar oven for our experiment long back but couldn’t test it since the weather was not hot enough or the day was just not right. We had thought of baking s’mores in this oven. Luckily, we could get all the things right to test this very dear project of ours. After all it involved a tasty treat at the end!

What you need

Cardboard box with attached lid
Aluminum foil
Plastic wrap
Black construction paper
Tape
Glue stick
Skewer or a stick
Xacto knife (or scissors)
S’mores supplies: grahams, chocolate, marshmallows

How to make a solar oven?

1. Using an xacto knife, cut a three-sided flap out of the top of the box, leaving at least a 1-inch border around the three sides.

2. Glue aluminum foil to the inside of the top flap, keeping the foil as smooth as possible. The foil reflects the sun into the oven.

3. Line the inside base of the oven with aluminum foil, again keeping it as smooth as possible.

4. Glue a black construction paper to the bottom of the box. The black color absorbs the heat.

5. Tape the plastic over the opening of the door. This will allow the air inside the box to heat up but keep the heat trapped inside the box.

6. Place a graham cracker, marshmallow, and chocolate inside the oven.

7. Place your oven outside in the sun (so that the top lid faces the sun). Use a skewer or a stick to prop the lid open at an ideal angle.

The chocolate will start transforming into soft squishy state and the marshmallows will look more puffed up from the heat. It took us about 90 minutes to bake our s’mores. The temperature outdoors was around 100 degree Fahrenheit. You can just wait until the chocolate melts and can be called good enough, and your tasty treat is done. Place another graham over the baked graham or just sandwich the two of the baked grahams. Time to feast on your solar oven s’mores!

Functions of the components of the Solar Oven

Aluminum foil: The sunlight is reflected when it strikes its surface.

Black construction paper:  Since black absorbs maximum light, it absorbs the light reflected from the aluminum foil. In the oven, the light energy is transformed into heat energy which demonstrates the law of thermodynamics which states that energy can’t be destroyed but can be only transformed from one state to the other.

Plastic wrap: It traps the heat radiated from the black construction paper causing the temperature inside the oven to rise.

Cardboard box: It serves as a physical oven and acts as an insulator of heat.

Science behind the working of the Solar Oven

A solar oven works by energy from the sun that penetrates into the surrounding environment thus demonstrating the process of radiation.

The shiny surface catches the sunlight and acts as a reflector reflecting it onto the base surface of the oven. The base surface gets heated. This heat is transfered to another object through direct contact thus demonstrating the process of conduction.

Further the air that is trapped inside gets heated by the process of convection which occurs when warm air which is less dense rises up and the colder air which is more dense sinks.

We are using a black sheet of paper for the base surface since black color absorbs maximum light and is transformed into heat energy. Plastic wrap prevents the hot air inside the oven from escaping thus creating a Greenhouse effect.

Notes:

1. Solar ovens slow-cook food on a low heat over a longer period of time than conventional ovens, but they do work.
2. The box should be tightly sealed or insulated to prevent the heat from escaping.

Reindeer Cupcakes recipe

If you are still looking for some baking idea for holidays, you’d probably not want to miss on the reindeer faced cupcakes. These are made with a simple cupcake recipe and decorated with most of the items available at hand.

For frosting, I used store brought Betty Crocker whipped frosting. You can also make your own frosting. Similarly, I made eye balls using Betty Crocker white frosting and peices of chocolate chips. You can use eye ball candies for the same.

Getting kids decorate the cupcake adds another level of fun to the making process. There is nothing more enjoyable than to eat your own decorated cupcakes.

Infact, they can be done at any time of the year as these cakes are simple vanilla cupcakes, with a reindeer decoration.

Ingredients:

for cupcakes

1 1/2 cup all purpose flour
1 cup sugar
1 tsp vanilla extract
2 eggs
1/2 cup milk
1/2 cup unsalted butter
2 tsp baking powder

for frosting and decoration

Chocolate frosting (whipped)
Vanilla frosting (whipped), for eyes
Chocolate chips pieces for eyeball
Cracker (cut into piece) for snout
M & M’s for nose
Cashews for horn

Directions:

1. Preheat oven to 375 degree Fahrenheit and line cupcake baking tin with cupcake liners.

2. In a bowl take dry ingredients that is all purpose flour, baking powder and salt.

3. In another bowl, with an electric mixer, beat sugar and butter until smooth and creamy then add egg one at a time until well combined. Add milk and vanilla essence into it and mix.

4. Fold in dry ingredients into the wet ingredients.

5. Fill the cupcake liners 3/4 full and bake it for 15-18 mins or until a tooth pick inserted into it comes out clean.

6. Remove the cup cakes from the tin and let it cool completely.

7. Now make reindeer faces: First using a knife or a frosting tool spread a layer of chocolate frosting. For eyes, take a small ball of white frosting and a small dot of chocolate piece. For snout, take a piece of cracker (broken into 1/4th) and put M & M’s on it for nose. Use cashews for horns.

Happy baking!